Ai SoftwareMARKETINGWEBSITES
When your CRM is cluttered or lacks structure, qualified opportunities often fall through the cracks. With The Vault CRM, users can avoid this by applying precise filters that organize lead data and highlight high-priority prospects. Filtering leads in The Vault CRM transforms raw data into practical insights; here’s how.
STEP 1: Access Your Leads Dashboard
To begin, log in to The Vault CRM and navigate to the “Opportunities” or “Leads” section. All your inbound and manually entered leads are centralized here. You’ll see a list or grid view of entries, each containing fields such as business name, contact info, lead source, value, pipeline stage, and more.
Use the search bar to quickly locate a specific lead.
Ensure that your lead data is clean and consistently entered to achieve optimal filtering results (e.g., all sources are labeled uniformly, and proper stage assignments are made).
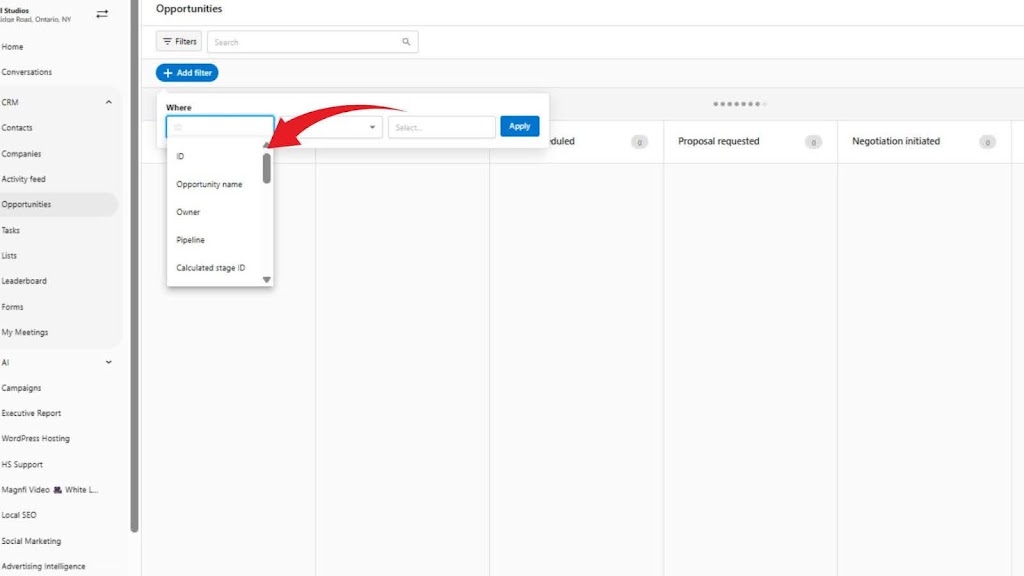
STEP 2: Apply Primary Filters
The Vault CRM provides high-functionality filter options that let you sort leads based on key attributes. For example, filtering by “Lead Status: New” and “Source: Email Campaign” will show newly generated leads from your most recent outbound efforts. To activate filters:
- Click on the “Filter” button, typically located above or beside your lead table.
- Choose from the available filter categories:
- Lead Status (e.g., New, Contacted, Qualified, Unqualified)
- Pipeline Stage (e.g., Prospecting, Proposal Sent, Closed-Won)
- Source (e.g., Web form, Email Campaign, Partner Referral)
- Tag (custom tags like “High Priority” or “Needs Demo”)
- Assigned Sales Rep
- Creation Date or Last Activity
- Select one or more values within a category to instantly update the view.
STEP 3: Stack Multiple Filters
If you’re handling a large volume of leads, single filters may not be enough. In The Vault CRM, users can layer filters for deeper segmentation. This allows for precise prioritization, showing you which leads are ready to close and require immediate attention.
- Click “Add Filter” to introduce another condition.
- Example: Filter for Lead Status: Qualified, Pipeline Stage: Proposal Sent, and Tag: High Priority.
- The system will only display leads that match all selected conditions.
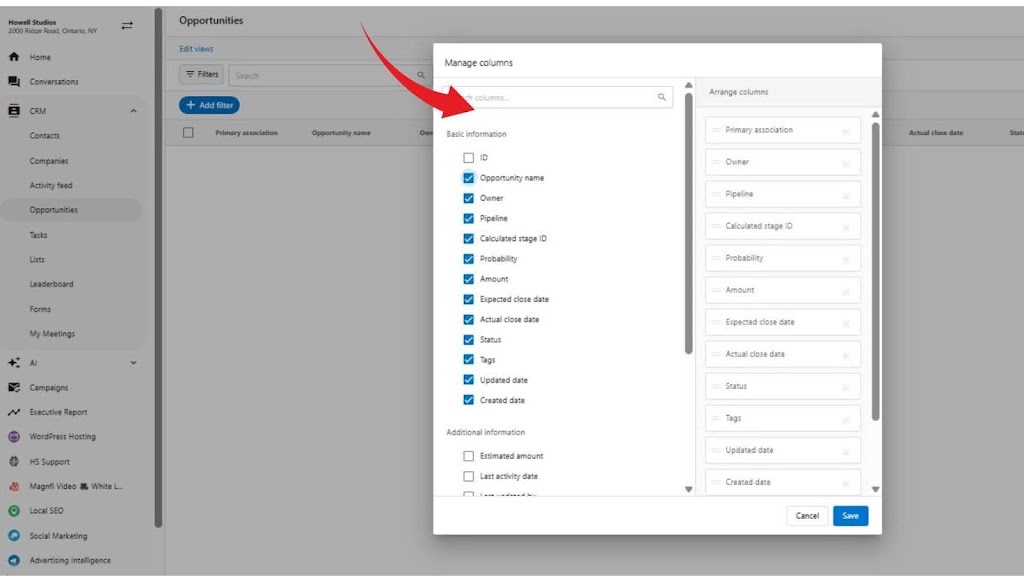
STEP 4: Save Custom Filters
Once you’ve built a filter set that reflects your workflow or campaign logic, save it for ongoing use. These saved filters streamline daily activities. Sales reps can jump straight into pre-filtered dashboards that align with their responsibilities, minimizing manual sorting.
- After applying your filters, click “Save View” or “Save Filter Set”.
- Give the filter a name (e.g., “Hot Leads – Last 7 Days”).
- Decide whether the view should be private (for personal use) or shared with your team.
STEP 5: Sort Filtered Results
Sorting helps determine who to call first. This level of granularity keeps sales efforts aligned with ROI-driven goals. After filtering:
- Click on column headers to sort by Deal Value, Last Activity Date, or Lead Creation Date.
- Use descending sort on deal size to identify high-value leads at the top.
- Sort by last contact date to re-engage leads before they go cold.
STEP 6: Tag and Annotate Leads
Tags add visual markers and aid future filtering. This layering of data ensures continuity, preserving context even when a lead is transferred to another team member. Within any filtered lead list:
- Select a lead and add a Tag like “Demo Scheduled” or “Q4 Target.”
- Use the Notes section to log specific context or meeting outcomes.
- Tags and notes are then searchable and filterable across your CRM.
STEP 7: Use Activity Filters
Consistency in follow-up is critical, as it ensures follow-up gaps are visible and corrected quickly. The Vault CRM allows users to filter by recent activity:
- Choose filters like “Last Contacted: More than 7 days ago” or “No Activity Logged.”
- Combine this with pipeline or value filters to isolate neglected but valuable leads.
STEP 8: Integrate with Lead Automation
When The Vault CRM is paired with lead generation and marketing automation tools, filters become even more powerful. Leads generated from form submissions, email clicks, or AI prospecting are automatically tagged and categorized. For example:
- Leads from a landing page can be automatically labeled as “Web Conversion.”
- These labels are instantly available as filters in the CRM.
- Sales reps can set alerts for newly filtered entries using automation triggers.
STEP 9: Export or Assign Filtered Lists
Once your filters return a priority list of leads, assign them to your team or export them for outreach. You can:
- Use the bulk assign option to delegate filtered leads to specific team members.
- Or export the view into a .CSV for campaign uploads or external use (e.g., phone dialers or custom reports).
Want to build a smarter sales system around your leads? When you use Howell Studio’s The Vault CRM’s filters strategically, you gain a clear picture of where to focus, who to engage, and when to act. Schedule your personalized demo today!